
For bathrooms up to 100 square feet, size your fan at 1 CFM per square foot of floor space. For larger bathrooms, add up fixture-based CFM allowances instead. Whatever number you land on, never go below the energy code minimum for intermittent or continuous use, and remember that installed airflow usually runs lower than the number printed on the box.
TL;DR:
- Fans rated at 0.1 inches of water gauge often deliver significantly less airflow than their label claims once ducted, making oversizing important.
- Using the fixture-based method for larger bathrooms ensures enough ventilation, especially when multiple moisture sources are present.
- Installing ducts straight outdoors with sealed joints and correct diameter minimizes static pressure and maintains rated airflow.
- A bathroom with taller ceilings requires calculating cubic footage and scaling fan capacity accordingly to ensure effective moisture removal.
- Regular maintenance of the fan and ductwork is essential to sustain performance and prevent mold or moisture-related damage over time.
Table of Contents
- How to calculate required CFM: square-foot and fixture-based methods
- Why the fan you buy may not deliver its rated CFM
- What to look for when buying: airflow, ducting, sound, and controls
- Installation best practices and simple verification steps
- Contractor perspective and when to hire a pro
- Impact of ceiling height on fan capacity requirements
- Considerations for multi-bathroom exhaust systems versus individual fans
- Typical installation costs and factors affecting total expenditure
- Estimated timeline for selecting and installing an exhaust fan
- Maintenance tips to ensure sustained fan performance over time
- If you want help: our ventilation and remodeling services
- FAQ
- Sources
- Why right-sizing and proper ducting save money long term
How to calculate required CFM: square-foot and fixture-based methods
The Home Ventilating Institute publishes the two calculation methods most contractors use, and which one applies depends on your bathroom’s size.
For bathrooms 100 square feet or smaller, multiply length by width to get square footage, then size the fan at 1 CFM per square foot. This assumes a standard 8-foot ceiling; taller ceilings need more volume moved per minute, which we cover below.
For bathrooms larger than 100 square feet, switch to the fixture-based method. Add up CFM allowances for each moisture source:
- Toilet: 50 CFM
- Shower or bathtub: 50 CFM
- Jetted tub: 100 CFM
Two examples make this concrete. A 12×12 bathroom covers 144 square feet, which crosses the 100-square-foot threshold, so you’d use the fixture method rather than square footage alone. A master bath with a shower, a toilet, and a standard tub would total 150 CFM using the fixture method (50 plus 50 plus 50), even though the room itself might only be 110 square feet.
Whichever method you use, compare your result against the code minimum of 50 CFM intermittent or 20 CFM continuous, cited in the Building America bathroom exhaust fan checklist, and install whichever number is higher.
Why the fan you buy may not deliver its rated CFM
Here’s where most sizing mistakes actually happen: the CFM number on the box isn’t what ends up moving through your bathroom. Fan manufacturers test and rate airflow at 0.1 inches of water gauge (in. w.g.), a low-resistance condition that doesn’t reflect a real duct run with elbows, transitions, and a wall or roof cap on the end.
Once a fan is installed with typical ductwork, static pressure commonly rises to around 0.25 in. w.g., and delivered airflow drops well below the rated figure, according to the Building America measure guideline on ventilation systems. A fan rated at 80 CFM at 0.1 in. w.g. might deliver meaningfully less once it’s actually ducted through your attic.
The fix is straightforward: choose a fan with published performance at 0.25 in. w.g., not just the headline number at 0.1 in. w.g., or oversize your selection to compensate for the drop.
If you want to confirm what you’re actually getting after installation, a few options exist:
- A powered flow hood measurement, the most accurate method, typically performed by an HVAC technician
- Contractor testing during a remodel or fan replacement, often bundled with the installation visit
- A simple DIY check: hold a tissue near the grille and confirm steady suction, or watch how quickly mirror fog clears after a shower
What to look for when buying: airflow, ducting, sound, and controls
A fan that looks right on the spec sheet can still underperform in your bathroom if you skip a few details.
- Prioritize models that list tested airflow at 0.25 in. w.g.; be skeptical of any spec sheet that only shows the 0.1 in. w.g. number
- Match duct diameter to the fan’s outlet, and avoid reducers that choke airflow partway through the run
- For long or restrictive duct runs, favor in-line or DC/variable-speed fans, which hold up better under static pressure than standard AC motors
- Check for ENERGY STAR certification, which sets efficacy and sone limits and requires airflow to be measured at 0.25 in. w.g.
- Look for low sone ratings if the fan will run continuously; a noisy fan tends to get turned off, defeating its purpose
Pro Tip: Pair your fan with a humidity sensor or a timer set for at least 10 minutes after you finish showering, since moisture lingers well after you step out and a fan that shuts off immediately leaves the job half done.
Installation best practices and simple verification steps
Sizing the fan correctly only pays off if the ductwork cooperates. A handful of installation details, drawn from DOE’s job aid on exhaust fan duct installation, make the difference between rated performance and a fan that barely moves air.
- Vent straight outdoors, never into an attic or soffit, using the shortest and straightest run you can manage
- Match or slightly upsize duct diameter to the fan’s outlet, and seal every joint with mastic or UL-approved foil tape rather than cloth duct tape
- Insulate ducts running through unconditioned space to R-8 and support them so they don’t sag and trap condensation
- Keep the first 2 to 3 feet of duct straight before any elbow, and choose smooth rigid or semi-rigid metal duct over crushed flexible duct wherever possible
Once installed, a few signs tell you whether it’s working. You should feel steady suction at the grille, mirrors should clear within a few minutes of the fan running, and you shouldn’t see condensation forming on walls or windows after a shower. If moisture lingers or you notice musty smells, that’s a sign to request a flow test rather than assume the fan is underperforming.
Contractor perspective and when to hire a pro
We’ve seen the same ventilation mistakes recur across bathrooms: fans sized for the room on paper but not for the fixtures they serve, duct runs with two or three unnecessary elbows crammed into a joist bay, and vents that terminate in the attic instead of outdoors.
Undersized fans and misrouted ducts are the single most preventable cause of bathroom moisture damage we encounter on remodel projects.
Replacing a single fan on a short, accessible duct run is often a reasonable DIY project if you’re comfortable with basic electrical work. Multiple-fixture master baths, long or complex duct routing through finished ceilings, and anything requiring a permit are situations where hiring a licensed professional protects both your investment and your warranty coverage.
Impact of ceiling height on fan capacity requirements
The square-foot and fixture-based methods both assume a standard 8-foot ceiling, which is the baseline the HVI guidance builds around. A bathroom with a 10 or 12-foot ceiling, common in some primary suites or older homes, contains more air volume than the floor area alone suggests.
For these taller rooms, calculate the room’s cubic footage (length times width times height) rather than relying on floor area alone, then size the fan to exchange that volume efficiently. A practical adjustment many contractors use is to scale up the square-foot CFM target proportionally to the extra height, since an 8 CFM per square foot allowance was never meant to clear a 12-foot column of humid air at the same rate as an 8-foot one.
Vaulted or sloped ceilings add another wrinkle, since moisture tends to collect at the highest point, which may sit well above the fan’s intake. In these cases, placing the fan closer to the peak of the vault, or adding a second smaller unit, moves humid air out before it condenses on the ceiling finish. When in doubt, round up rather than down. An oversized fan that runs at lower speed on a quieter setting beats an undersized one that never quite clears the room.
Considerations for multi-bathroom exhaust systems versus individual fans
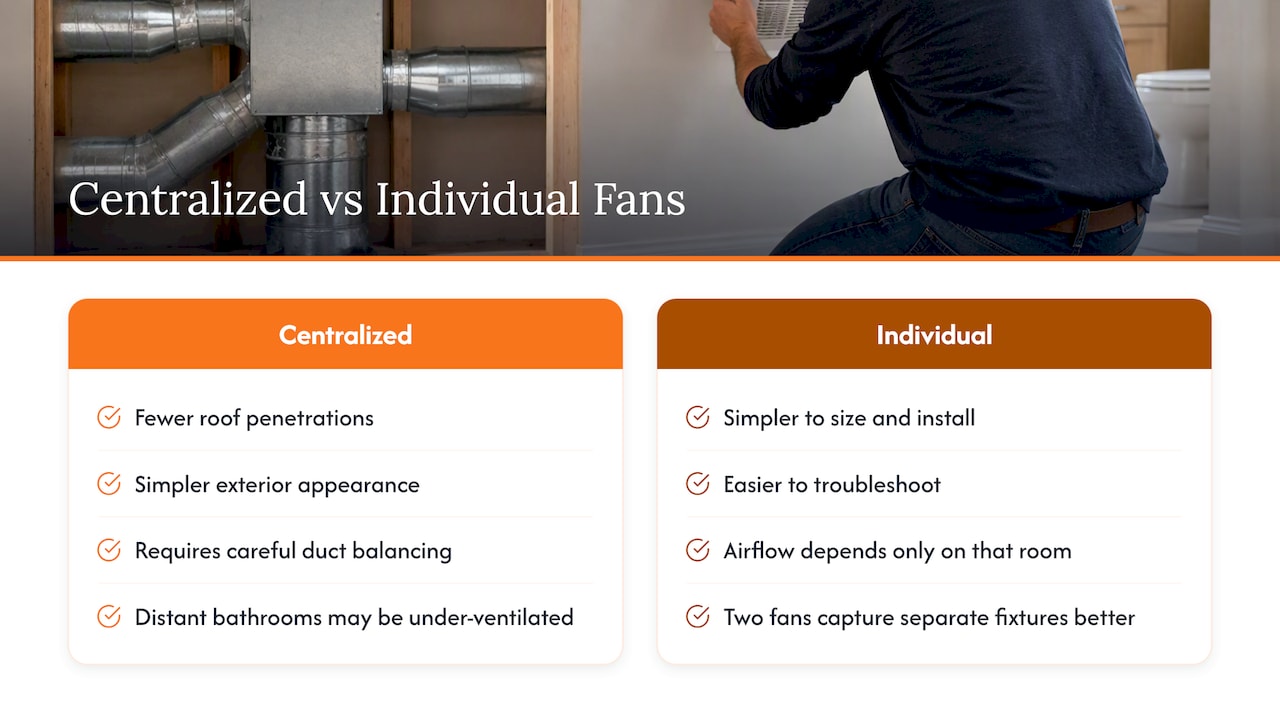
Homes with several bathrooms sometimes use a single centralized exhaust system, with one larger fan pulling air through ducts from multiple rooms, instead of a dedicated fan in each bathroom. Centralized systems can simplify roof penetrations and reduce the number of exterior vent caps, which some homeowners prefer for appearance and long-term maintenance.
The tradeoff is that a shared system needs careful duct balancing so every bathroom gets adequate airflow, not just the one closest to the fan. A poorly balanced system can leave a distant bathroom under-ventilated even though the central fan’s total CFM rating looks sufficient on paper.
Individual fans, by contrast, are simpler to size, install, and troubleshoot since each room’s airflow depends only on its own fan and duct run. In larger master bathrooms with separate shower and tub zones, placing two smaller fans near each moisture source rather than one larger central unit often improves capture at each fixture and keeps perceived noise lower at any single location, since the sound load splits between two units instead of concentrating in one.
For most single-family homes, individual fans remain the simpler and more reliable choice. Centralized systems make more sense in larger or multi-story layouts where reducing roof penetrations carries real value.
Typical installation costs and factors affecting total expenditure
A straightforward swap of one bathroom fan for a comparable model, using the existing duct run and electrical connection, tends to sit at the lower end of the cost range for ventilation work. Costs climb when the project involves relocating the fan, lengthening or rerouting the duct, or upgrading the electrical circuit to support a larger or variable-speed unit.
Several factors drive the total beyond the fan itself: duct length and routing complexity, whether the attic or roof penetration needs modification, the fan’s features like humidity sensing or built-in lighting, and whether the work is a standalone repair or bundled into a larger bathroom renovation. A full bathroom remodel that includes ventilation as one line item among many (new cabinetry, countertops, flooring, and fixtures) spreads the ventilation cost across a bigger project budget, which is often how our bathroom remodeling clients approach it rather than treating the fan as an isolated purchase.
Permitting requirements can also add to the timeline and cost in some jurisdictions, particularly when electrical work or structural penetrations are involved. Checking local code requirements before starting work avoids surprises partway through the project.
Estimated timeline for selecting and installing an exhaust fan
Choosing the right fan rarely takes long once you know your square footage and fixture count: calculating CFM, comparing a handful of models rated at 0.25 in. w.g., and placing an order typically wraps up within a day or two of research.
Installation timing depends heavily on the scope. A direct fan replacement on an existing duct run, with no rerouting needed, is often a same-day job for a licensed electrician or contractor. Projects that require new ductwork, a relocated vent termination, or electrical panel work stretch into a multi-day timeline, especially if permitting is required in your area.
When ventilation work is part of a broader bathroom renovation, the fan installation itself is a small piece of a longer project schedule that also includes demolition, plumbing, electrical, and finish work. Building that step into the overall renovation plan, rather than scheduling it separately, tends to keep the project moving without added delays.
Maintenance tips to ensure sustained fan performance over time
A correctly sized fan with well-installed ductwork still loses performance over time without basic upkeep. Dust and lint accumulate on the grille and blades, gradually restricting airflow even though the fan sounds like it’s running normally.
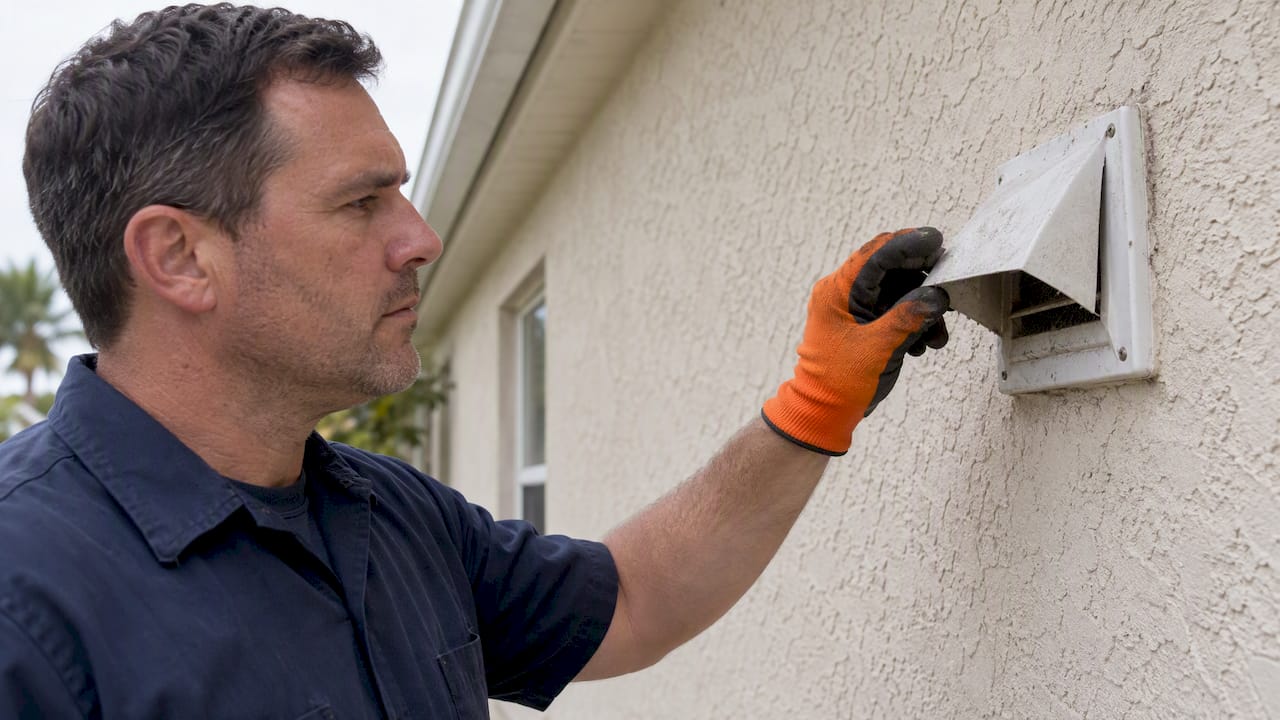
Clean the grille and visible blades every few months with a vacuum attachment or a damp cloth, and check that the exterior vent cap’s flap opens freely and isn’t blocked by debris, nesting insects, or paint buildup. A stuck or clogged exterior damper can quietly cut delivered airflow even when the fan motor itself is working fine.
Listen for changes in sound or vibration, since a fan that suddenly runs louder or rattles may have a failing motor bearing or a loose duct connection. Trapped humidity from a fan that’s losing effectiveness is also one of the more common causes of bathroom mold, so catching a performance drop early is worth the few minutes a seasonal check takes. If airflow feels noticeably weaker despite a clean grille, that’s a sign the duct itself may have come loose or sagged, which calls for a closer look rather than a fan replacement.
If you want help: our ventilation and remodeling services
If calculating CFM and inspecting duct runs sounds like more than you want to take on, professionals can handle bathroom ventilation as part of remodeling work.

- Bathroom ventilation assessments that check existing fan sizing against your room’s actual fixture load
- Fan replacement and upgrades to models tested at 0.25 in. w.g. for real-world performance
- Duct rerouting to fix the short-run, sealed-joint details that determine whether a fan delivers its rated airflow
- Full bathroom remodels that fold ventilation into cabinetry, fixture, and layout decisions from the start
Check our current offers if you’d like a quote or an onsite evaluation.
FAQ
Is 110 CFM too much for a small bathroom?
Not necessarily. For a bathroom under 100 square feet, 110 CFM is above the basic 1 CFM per square foot guideline from the Home Ventilating Institute, but running a slightly larger fan on a lower speed setting is a reasonable way to compensate for the drop between rated and installed airflow.
What size bathroom is 70 CFM good for?
Using the 1 CFM per square foot rule, a fan sized for about 70 square feet can cover that bathroom. Since installed airflow typically runs lower than the rated number once ducted, confirm the fan’s performance at 0.25 in. w.g. rather than relying on the rated CFM label alone.
How do I calculate the size of an exhaust fan for my bathroom?
Measure your bathroom’s length and width in feet and multiply them for square footage; if the result is 100 square feet or less, size your fan at 1 CFM per square foot. For larger bathrooms, use the HVI fixture-based method, allowing 50 CFM per toilet, shower, or standard tub and 100 CFM per jetted tub, then compare your total against the code minimum of 50 CFM intermittent or 20 CFM continuous.
How many CFM do I need for a 12×12 bathroom?
A 12×12 bathroom covers 144 square feet, which puts it above the 100-square-foot threshold for the simple square-foot rule. At that size, use the fixture-based method instead: a toilet, shower, and tub each add 50 CFM, so a typical combination lands between 100 and 150 CFM depending on which fixtures are present.
Sources
- Bathroom exhaust fan (Building America / PNNL checklist)
- Home Ventilating Institute — bathroom ventilation guidance
- Measure Guideline: Selecting Ventilation Systems for Existing Homes (Building America / PNNL)
Why right-sizing and proper ducting save money long term
Spending a little more upfront on a fan rated for real-world conditions, and on ducting done right, costs far less than fixing mold or peeling paint later. We’ve watched both mistakes play out on remodel projects: the undersized fan that never quite clears the room, and the duct that was never sealed in the first place.
Our advice stays simple: find a fan with tested performance at 0.25 in. w.g., then balance CFM against sound so you’ll actually run it every day.
— Cameron