
Design your outdoor kitchen as an outdoor room: place it near your home’s utilities, choose weather-resistant materials, plan overhead cover and ventilation, and let plantings soften the hard edges. Check fire setbacks, building permits, and HOA rules before you break ground, since these approvals often set your entire construction timeline.
TL;DR:
- Position your outdoor kitchen near existing utilities to minimize trenching costs, especially within 10 feet of the house for maximum savings.
- Use durable, weather-resistant materials like sealed concrete or porcelain for countertops and choose stainless steel or composite cabinetry to withstand moisture and UV exposure.
- Incorporate shading options such as pergolas for mild climates or pavilions for rain-prone regions, ensuring heat and smoke vent away from seating and cooking areas.
- Follow safety and permit guidelines by confirming fire setbacks, appliance clearances, and HOA rules early to prevent project delays.
- Opt for layouts that suit your yard size, like linear, L-shaped, or island configurations, with clear workspaces and appropriate distances for appliances and movement.
Table of Contents
- Design principles: outdoor room, circulation, and sightlines
- Layouts and placement: proximity to utilities, access, and scale
- Materials and finishes that withstand weather and use
- Shade, cover, and ventilation options
- Hardscape, levels, and retaining walls
- Planting and softscape to blend and support function
- Safety, permits, and HOA checklist
- Practical idea gallery: 8 compact combinations and budgets
- Why hire a pro: common pitfalls, process, and our credentials
- Author perspective: balance lasting choices with tasteful trends
- Domestic Kitchen & Bath: how we work and request a consultation
- FAQ
- Sources
Design principles: outdoor room, circulation, and sightlines
The best outdoor kitchens read like a true room, not an appliance parked on a slab. Landscape design theory treats these spaces the way an architect treats an interior room: defined by a ground plane, overhead elements, and clear thresholds that separate cooking from lounging.
Three habits make this work in practice:
- Mark the entry with a change in paving material or a low wall so the space feels intentional, not leftover.
- Keep a short work triangle between grill, prep counter, and sink so cooking does not turn into a hike.
- Orient the grill and vent hood away from seating areas and open windows so smoke drifts clear instead of into your guests or your kitchen.
Get these three right and the rest of your design decisions get easier, because you are building within a frame instead of guessing at one.
Layouts and placement: proximity to utilities, access, and scale
Where you put the kitchen matters as much as what you put in it. Siting it close to your home’s existing water, gas, and electrical lines keeps trenching and conduit runs short, which keeps your budget in check. A kitchen 10 feet from the house connects to utilities far more cheaply than one at the back of a deep lot.
Match your layout to your yard shape:
- Linear layout: a single run of counter and appliances against a wall or fence, ideal for narrow side yards or modest budgets.
- L-shaped layout: wraps a corner to separate cooking from seating, a good fit for mid-size patios that need both zones.
- Island layout: a freestanding counter with cooking on one side and bar seating on the other, suited to larger, more open backyards.
For clearances, give counters at least 24 inches of depth, allow 36 inches of walking space behind a cook, and leave 42 inches where guests will be seated and someone needs to pass behind them.
Materials and finishes that withstand weather and use
Your countertop and cabinetry choices decide how your kitchen looks in year one versus year ten. Granite resists heat and scratching well but costs more upfront. Sealed concrete and porcelain slab tend to be the most affordable options that still hold up to years of sun and rain, since porcelain resists UV fading and concrete can be formed and sealed on site at a lower material cost.
- Choose stainless steel, marine-grade aluminum, or sealed composite cabinetry over untreated wood or particleboard in any wet or coastal climate.
- Pick textured, slip-resistant surfaces for flooring near the cooking zone, since grease and water pool there.
- In freeze-thaw climates, confirm your countertop and grout are rated for repeated freezing, not just heat.
Pro Tip: Ask your fabricator whether a stone or porcelain slab is rated for outdoor freeze-thaw cycles before you commit, since not every “outdoor” product actually is.
Shade, cover, and ventilation options
Overhead structure affects comfort, appliance protection, and code compliance all at once. An open pergola gives partial shade and lets smoke and heat rise freely, while a solid pavilion roof gives full weather protection but demands more attention to ventilation and non-combustible clearances around any heat source. Motorized louvered roofs split the difference, letting you dial in sun and airflow as conditions change.
- Open pergolas suit mild, dry climates where rain protection matters less than shade.
- Solid pavilions fit rain-prone regions or homeowners protecting a full built-in kitchen.
- Louvered roofs work well for anyone who wants one structure to handle both bright afternoons and sudden showers.
Whatever you choose, keep any built-in grill’s listed clearance from combustible overhead material, since unlisted barbecues are commonly restricted from sitting under combustible overhead construction entirely.
Hardscape, levels, and retaining walls
Heavy appliances need a stable, level base, so your patio material and preparation matter more here than in a typical seating area. Poured concrete, large-format pavers, or natural stone set on a compacted, reinforced base all handle the weight of a built-in grill island without settling unevenly over time.
- Retaining walls do triple duty: they hold back a slope, double as extra seating, and can be capped to form a planter.
- On sloped lots, a stepped series of low walls often works better than one tall wall, both structurally and visually.
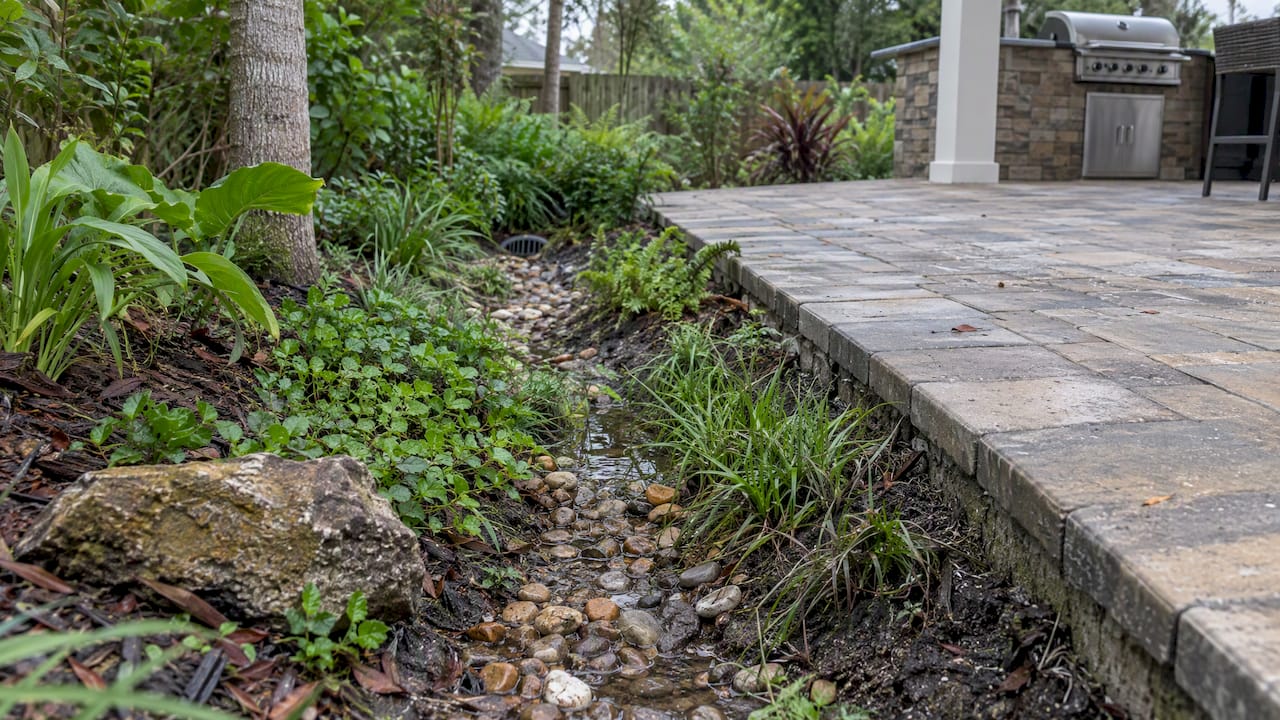
- Grade your patio away from the house and any appliance base, and add a gravel or drain line beneath pavers in frost-prone areas to prevent heaving and cracking.
Good drainage planning here saves you from costly repairs once appliances and cabinetry are already installed.
Planting and softscape to blend and support function
Plants do the work that hardscape cannot: they soften straight lines and make a new structure feel like it has always belonged in your yard. A trellis with climbing jasmine or a row of tall ornamental grasses along a fence line adds height and privacy without closing the space in.
- Plant a compact herb bed (rosemary, thyme, basil) within arm’s reach of your prep counter for easy harvesting while you cook.
- Choose regionally appropriate, low-maintenance species so your landscaping does not become another weekly chore.
- Place windbreak plantings to the side of the grill rather than directly behind it, so you cut wind without trapping smoke against your seating area.
Pro Tip: Keep any dense hedge or windbreak at least a few feet from the cooking zone so it buffers wind without holding smoke in one place.
Safety, permits, and HOA checklist
Permitting is where good projects stall, so clear this hurdle early rather than after your materials arrive. Expect to need separate approvals depending on scope and jurisdiction.
- Confirm fire-code setbacks and appliance clearances from property lines and structures before finalizing your layout.
- Identify which permits apply: building, mechanical, electrical, and plumbing are common for a full outdoor kitchen, and a structural engineer may be required for retaining walls or covered structures.
- Check HOA or condo association rules, which often require a stamped site plan in addition to municipal approval.
Treat approvals as a critical path item: permitting and HOA sign-off are often the single largest source of schedule delay on outdoor kitchen projects, according to municipal guidance on outdoor cooking installations. Separately, commercial guidance in Missouri notes that canopy size and fire-district clearance requirements can trigger additional permit review, a useful reminder that residential rules vary just as much by location.
Practical idea gallery: 8 compact combinations and budgets
Concept thumbnails help you picture your own yard before you commit to a design. These four starting points cover a range of budgets and lot conditions.
- Low budget: a compact linear grill station with a short counter run and a vertical potted herb wall behind it for color and seasoning on demand.
- Mid budget: an island layout with bar seating, a pergola overhead, and an integrated outdoor refrigerator for drinks and prep ingredients.
- High budget: a fully covered pavilion with built-in storage, a wood-fired pizza oven, and landscape lighting woven through surrounding beds.
- Sloped lot: a retaining-wall seat wall paired with a compact pizza oven, which turns a grading challenge into the kitchen’s main gathering spot.
Each of these pairs one landscape element (the herb wall, the pergola, the lighting, the retaining wall) with the kitchen itself, which is the detail that keeps a build from looking like an appliance drop rather than a designed space.
Why hire a pro: common pitfalls, process, and our credentials
Utility hookups, permit submissions, grading, and tying hardscape into existing drainage are where most DIY outdoor kitchens run into trouble. Frequent mistakes include using indoor-rated cabinetry outdoors, ignoring appliance clearance requirements, and placing a vent hood where smoke blows straight into the seating area.
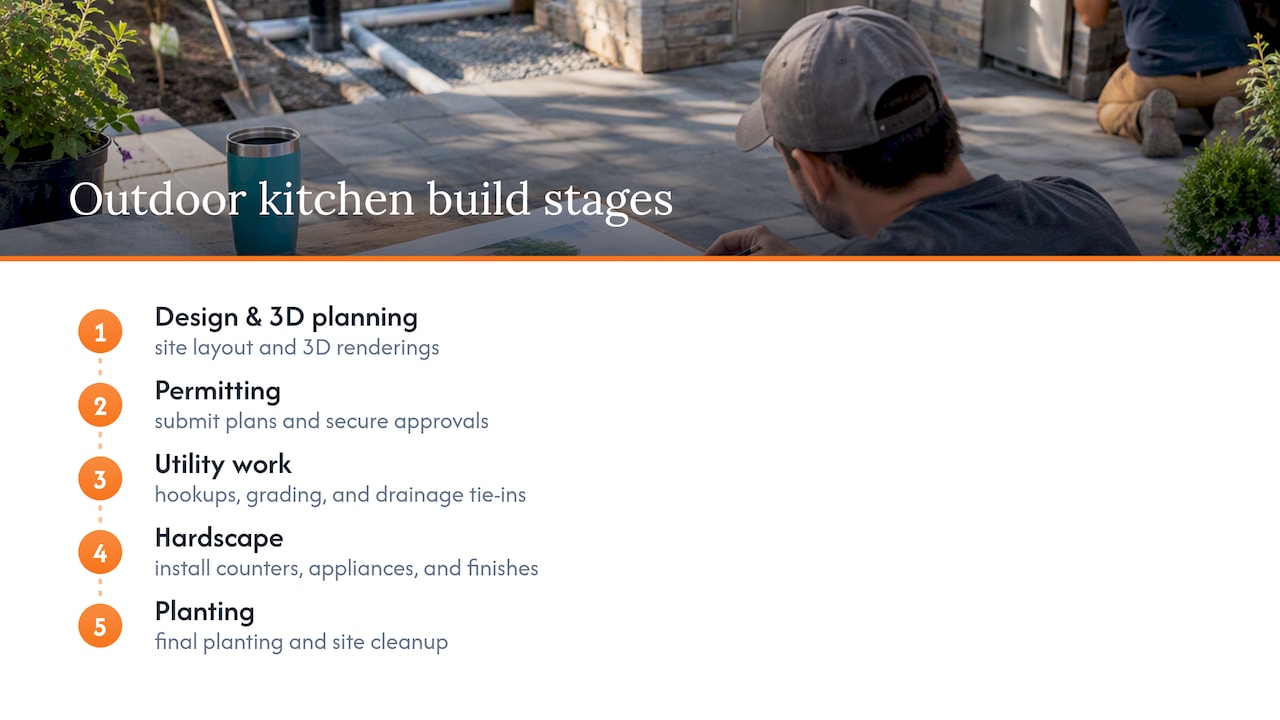
We have completed many remodeling projects and hold a high customer rating, backed by a satisfaction guarantee on every job. Our process typically moves from design and 3D planning through permitting, utility work, hardscape, and planting, so you are not coordinating separate trades yourself.
Author perspective: balance lasting choices with tasteful trends
My honest view after looking at hundreds of these projects: spend first on structure, drainage, and shade, because those decisions are nearly impossible to change later. Furniture and finishes can follow trends and get swapped out in a weekend. Planting and lighting, meanwhile, deliver the most noticeable daily enjoyment for the least money, so do not let a tight budget skip them in favor of a fancier appliance.
— Cameron
Domestic Kitchen & Bath: how we work and request a consultation
We handle outdoor kitchen projects as full design-build work: design, permitting, utility hookups, hardscape, and landscape integration under one contract, so your patio, plantings, and cooking space get planned together instead of patched together.

- Every project is backed by our satisfaction guarantee and built by qualified professionals.
- Our experience includes numerous completed kitchen, bath, and outdoor projects with a strong average customer rating.
If you are ready to talk through your yard, your budget, and a realistic timeline, visit our outdoor kitchen contractors page to request a consultation.
FAQ
What are the trends for outdoor kitchens in 2026?
Homeowners continue to favor treating the outdoor kitchen as a full outdoor room, with layered shade (pergolas and louvered roofs), integrated planting, and lighting designed for evening use. Material choices lean toward durable, natural-looking surfaces that age well outdoors rather than purely decorative finishes.
What is the cheapest option for outdoor countertops?
Sealed concrete and porcelain slab tend to be the most budget-friendly countertop materials that still hold up over years of sun, rain, and temperature swings. Porcelain resists UV fading particularly well, while concrete offers lower material costs since it can be formed on site.
What is the best layout for an outdoor kitchen?
The right layout depends on your yard: a linear run suits narrow spaces, an L-shape separates cooking from seating on mid-size patios, and an island works best in larger, more open yards. All three benefit from a short work triangle between grill, prep counter, and sink.
What can I put in my outdoor kitchen?
A typical setup includes a grill or built-in cooktop, a prep counter, a sink, and refrigeration, often rounded out with bar seating and overhead lighting. Many homeowners also add a pizza oven or a dedicated beverage station depending on how they entertain.
Sources
- Adding or Replacing a BBQ/Outdoor Kitchen | City of Irvine
- Homeowner garden design series: creating outdoor rooms | Oklahoma State University
- Outdoor Cooking | St. Louis County (commercial guide)