
Yes, you can plumb an outdoor kitchen yourself, but five things need to happen first: plan your supply line route, secure a code-compliant drain and vent, protect every pipe against freezing, install proper backflow prevention, and confirm whether your project needs a permit. Before you buy a single fitting, measure the distance from your outdoor kitchen site to the nearest water and drain connection, then call your local building department to ask what triggers an inspection.
TL;DR:
- Use PEX-A piping for buried supply lines due to its flexibility and freeze resistance, while copper or CPVC are suitable for short, above-ground runs.
- Install a proper venting system using approved methods like air admittance valves or existing vent stacks, noting local restrictions on outdoor venting devices.
- Ensure drain lines have a minimum slope of 1/4 inch per foot and include a P-trap to prevent sewer gas infiltration, with routing to sewer or dry well depending on site conditions.
- Protect all exposed pipes and fixtures from freezing with proper burial depth, insulation, and seasonal drain-down routines, and winterize by draining, closing valves, and adding foam sleeves or heat tape.
- Obtain necessary permits for drainage, water, gas, or electrical connections, especially for sewer tie-ins or long trench runs, to avoid inspection failures and costly fixes later.
Table of Contents
- The four plumbing components every outdoor kitchen needs
- Choosing pipes, sinks, faucets, and backflow devices that last outdoors
- How to choose location, estimate costs, and what typically triggers a permit
- A practical step-by-step sequence and clear decision points for DIYers
- How to winterize and maintain outdoor plumbing so it lasts
- When a full-service remodeler is the right choice
- A pragmatic take on DIY outdoor plumbing
- Let us build your outdoor kitchen the right way
- FAQ
- Sources
The four plumbing components every outdoor kitchen needs
Every outdoor kitchen plumbing system rests on four parts working together: supply, drain, vent, and freeze protection. Skip one, and you either fail inspection or face a cracked pipe by February.
Your supply line brings hot and cold water (or just cold, paired with an on-demand heater) to the sink and any other fixtures. Shutoff valves belong at an accessible point, ideally inside the cabinetry, so you can isolate the line for repairs or winterizing without shutting off water to the whole house.
The drain needs a P-trap to block sewer gas, a minimum slope of 1/4 inch per foot toward its outlet, and a decision about where that water goes: tying into your home’s sewer line or routing to a dry well, each with its own cost and permit implications, as outdoor kitchen plumbing guides commonly outline.
Venting is the piece most DIYers forget. Without it, drains gurgle, slow down, or siphon the trap dry. The 2021 IPC outlines several accepted venting methods for island-style sinks, including air admittance valves, though local jurisdictions don’t all allow AAVs outdoors.
Freeze protection rounds out the list: burial depth, insulation, and a seasonal shutdown routine.
- Supply: dedicated hot and cold lines or a single cold line with an on-demand heater.
- Drain: P-trap plus 1/4 inch per foot slope to a sewer tie-in or dry well.
- Vent: a code-accepted method so the drain functions and sewer gas stays out.
- Freeze protection: burial depth, insulation, and a drain-down plan for winter.
Choosing pipes, sinks, faucets, and backflow devices that last outdoors
Material choice determines whether your outdoor kitchen plumbing survives its first freeze or needs replacing every few years.
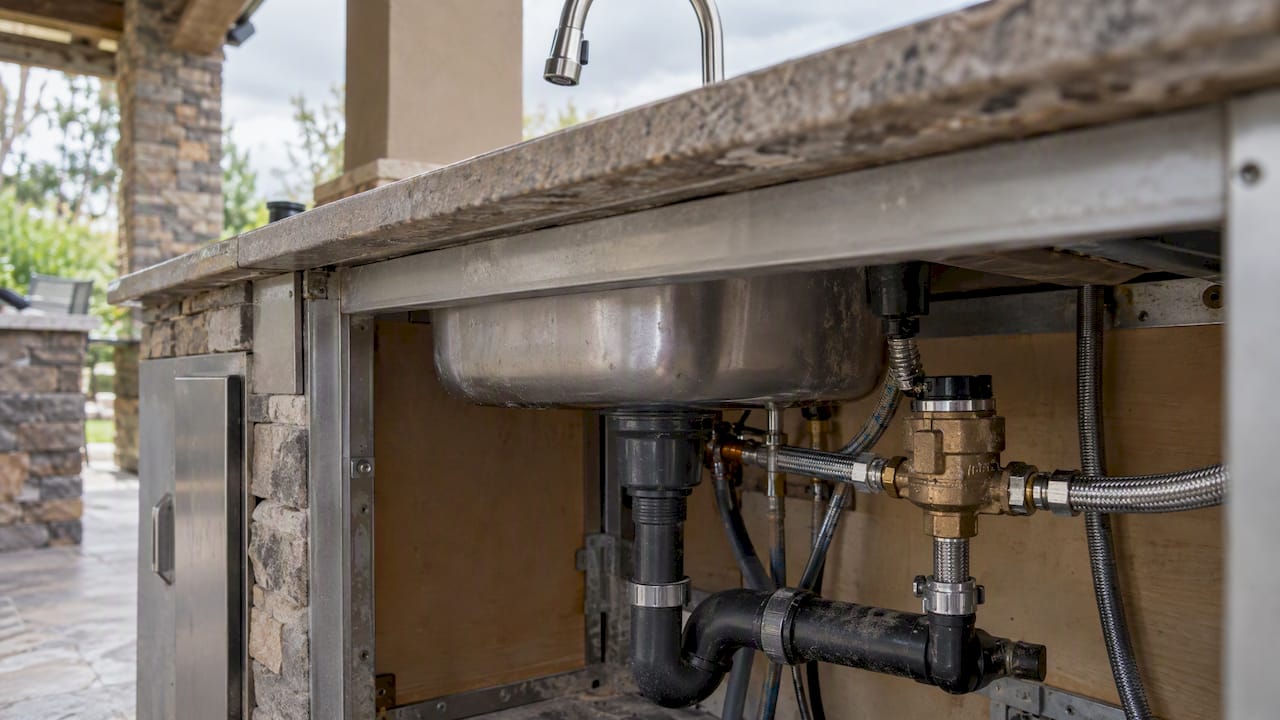
For buried supply runs, PEX-A is commonly recommended because it flexes under freeze pressure instead of splitting the way rigid copper can. Copper still makes sense for short, exposed runs near the sink where UV exposure and rodents aren’t a concern, while CPVC works as a budget-friendly alternative in milder climates.
For the sink itself, look for 16 to 18-gauge 304 or 316 stainless steel, the gauge range outdoor-rated sinks are typically built from for resistance to dents and corrosion from weather exposure.
- PEX-A for buried runs; copper or CPVC for short, protected, above-ground sections.
- Sink: 16 to 18-gauge 304 or 316 stainless steel.
- Frost-proof faucets paired with a backflow prevention device on any potable connection.
- Flexible braided supply lines and accessible isolation valves for quick winterizing.
Pro Tip: Install your shutoff valves and a drain-back port inside the cabinet base so you can empty the whole system in minutes without pulling the sink.
How to choose location, estimate costs, and what typically triggers a permit
Siting your outdoor kitchen near your home’s existing water supply and drain, waste, and vent stack cuts trenching distance, labor, and cost. The farther you build from those connections, the more you’re paying for pipe, excavation, and potentially a pump if gravity drainage isn’t an option.
Permits are usually required when you’re tying into the home’s drain, waste, and vent system, adding a new branch water line, or bringing in gas or electrical circuits for a built-in grill or heater. Skipping that step risks a failed inspection later, which costs more to fix than the permit would have.
- Site near existing water and DWV stacks to minimize trench length and cost.
- Permits typically apply to DWV tie-ins, new water branches, gas lines, and electrical runs.
- Common inspection failures: AAVs installed where local code disallows them, missing or incorrect backflow devices, and burial depth that falls short of frost-line requirements.
- Cost drivers include trench distance, sewer tie-in versus dry well, slab penetrations, and winterization hardware.
A practical step-by-step sequence and clear decision points for DIYers
A clear sequence keeps a DIY outdoor kitchen plumbing project from turning into a half-finished trench by the weekend’s end.
- Plan the layout and confirm your water source and drain destination.
- Call 811 before you dig, so utility lines get marked.
- Trench or route your supply line, keeping burial depth at a baseline of 24 inches in frost-prone climates, per PEX freeze-resilience guidance.
- Install shutoff valves and flexible connections at the cabinet.
- Mount the sink and fit the P-trap and drain line.
- Route the drain at a minimum slope of 1/4 inch per foot to your chosen outlet.
- Address venting, whether through an AAV where permitted or a branch tie to an existing vent stack.
- Pressure-test the supply, run water for an extended period to check for backups, and soap-test every threaded joint.
Pro Tip: Run the drain test with a full sink of water released at once, not a trickle, so you catch slow drains before the inspector does.
Hire a licensed plumber when the job involves a sewer tie-in, complex venting, gas or electrical integration, or any permit-only scope, and especially if your trench route runs near existing utility lines.
How to winterize and maintain outdoor plumbing so it lasts
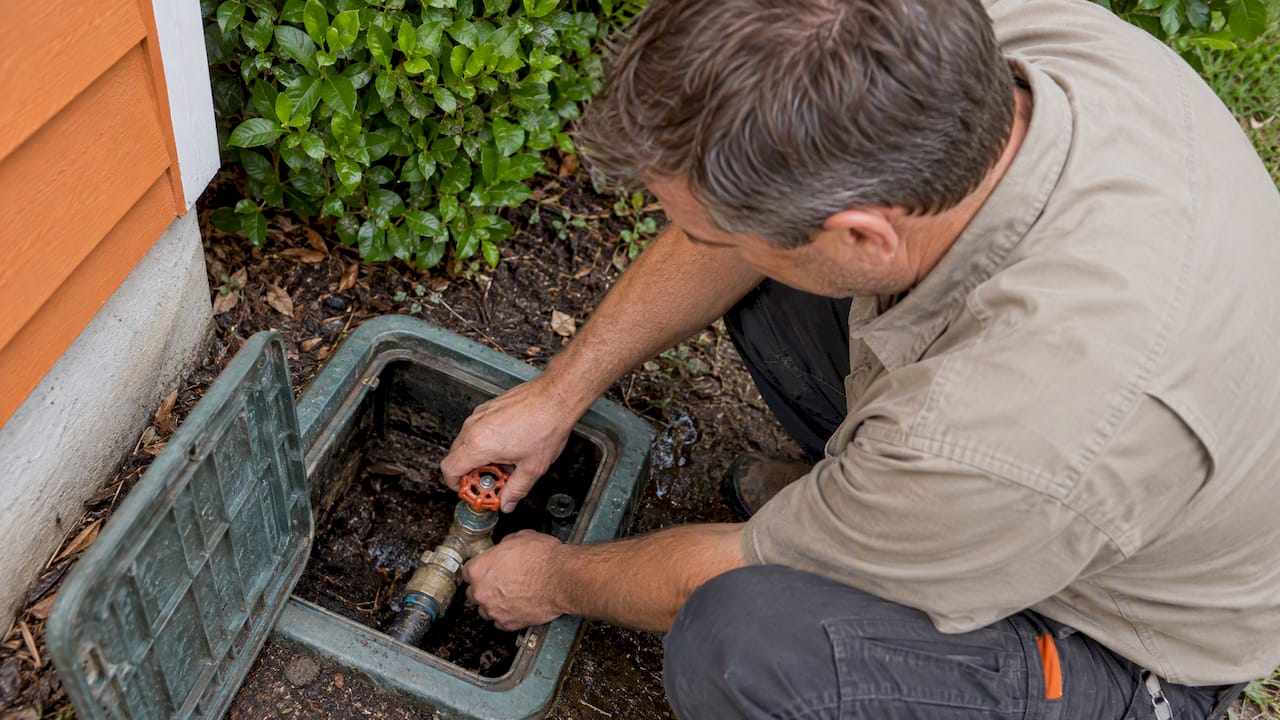
Winterizing takes 20 minutes and saves you a spring full of leak repairs. Close the indoor isolation valve feeding the outdoor line, open the outdoor faucet and drain point to release trapped water, and use compressed air to blow out any water that won’t drain by gravity alone.
Foam pipe sleeves and heat tape add a second layer of protection on top of proper burial, and a baseline depth of 24 inches keeps most lines below the frost line in colder regions.
- Close indoor isolation valves, then open outdoor drains and faucets to release pressure.
- Add foam sleeves or heat tape on any exposed sections above the burial line.
- Test backflow devices and clean faucet aerators each spring.
- Check sink flange seals and flexible hose connections annually for wear.
Backflow prevention isn’t optional on a potable connection. The EPA’s cross-connection control guidance documents cross-connections as a recognized public health hazard, which is why containment and periodic testing of backflow assemblies matter even in a backyard setup.
If you ever see a sudden drop in water pressure or notice water pooling near the trench line, shut off the main valve, isolate the outdoor run, and call a plumber before the problem spreads.
When a full-service remodeler is the right choice
Some parts of an outdoor kitchen build go beyond a weekend project, and that’s where our experienced remodeling team comes in. With many years in the business and hundreds of projects completed, we handle the full scope: sewer tie-ins, gas and electrical coordination, and permit-managed installations. Hiring out these pieces means coordinated trades and work that passes local inspection the first time.
A pragmatic take on DIY outdoor plumbing
We think capable homeowners should tackle what they can: cabinet prep, fixture selection, even running supply line to an accessible shutoff. But the inspector isn’t optional, and neither is a properly vented, backflow-protected system.
Our honest take: handle the straightforward work yourself, then bring in a licensed pro for drain, waste, and vent tie-ins, gas lines, or any trench that runs deep or long. Use the checklist in this guide as your decision point for where your comfort level ends.
— Cameron
Let us build your outdoor kitchen the right way
If the permit paperwork, sewer tie-in, or winterization planning feels like more than you want to take on, we design and build complete outdoor kitchen setups with plumbing, gas, and electrical handled by one coordinated team.

We manage the permits, the inspections, and the cold-weather prep so your outdoor kitchen works the first season and every one after. Request a consult through our outdoor kitchen contractors page to get a project estimate.
FAQ
What type of pipe is best for an outdoor spigot?
PEX-A is the material most often recommended for outdoor spigot and supply lines because it flexes rather than cracks under freeze pressure, according to freeze-resilience guidance from Uponor. Copper works for short, exposed runs, but buried sections benefit most from PEX’s flexibility.
Where should I drain my outdoor kitchen sink?
Your two main options are tying into your home’s existing sewer line or routing to a dry well, and the right choice depends on your site’s distance from the home’s drain, waste, and vent stack and your local code, as outdoor kitchen plumbing resources explain. A sewer tie-in usually requires a permit, while a dry well has its own regulatory limits depending on your area.
Is there an outdoor kitchen sink that doesn’t require plumbing?
Some portable or self-contained outdoor sink units use a fresh water reservoir and a gray water catch tank instead of fixed supply and drain lines, which avoids trenching and permits entirely. These work well for light use but lack the continuous water flow and drainage capacity of a plumbed sink tied into your home’s system.
What is the best faucet for an outdoor kitchen sink?
A frost-proof faucet paired with an approved backflow prevention device is the safest choice for any outdoor sink connected to your home’s potable water supply. The EPA’s cross-connection control manual treats backflow prevention as a standard safeguard against contamination on outdoor and irrigation connections alike.
Sources
- Uponor — PEX freeze resilience / outdoor use guidance
- A guide to stainless-steel sink gauges — World Coppersmith
- EPA — Cross-Connection Control Manual
- ICC — Methods of venting plumbing fixtures and traps (2021 IPC brochure)
- OutdoorKitchenSetup — Outdoor kitchen plumbing guide