
A low backsplash is a minimalist option, while a standard partial one is often 4 inches high or about 18 inches from counter to wall cabinets, and a full-height one climbs from counter to ceiling. Behind the stove, tile usually goes up to the hood, roughly 24–30 inches above the cooktop. Taller runs cost more and demand precise templating.
TL;DR:
- Measure each wall from the installed countertop, calculate separate rectangles for the range and hood, and recheck before ordering slab fabrication.
- Ceramic tile runs $10 to $25 per square foot, while marble or quartz slabs cost $60 to $150; full height may double or triple costs.
- With upper cabinets, extend tile to their undersides for splash protection; without them, carry it to a shelf or ceiling, especially near a busy range.
- Countertop outlet spacing follows electrical code, but outlet height does not; electricians often center receptacles about 18 inches above the finished counter as a convention.
Table of Contents
- What are the common kitchen backsplash heights?
- How do you measure backsplash height and area?
- How does backsplash height affect material choice and cost?
- How do you choose the right backsplash height for your kitchen?
- What installation and code details affect final height?
- What should you check before measuring and ordering?
- Which backsplash height would I pick as a default?
- How can we help with your backsplash project?
- FAQ
- Sources
What are the common kitchen backsplash heights?
Three heights cover most kitchens, and the stove gets its own rule.
A low or mini backsplash suits a modern, minimalist look. It seals the joint where the counter meets the wall but protects very little of the wall above.
A standard partial backsplash has two common meanings. One is the 4-inch version, often made by extending the countertop material up the wall. It is traditional, budget-friendly, and fine for partial renovations. The other is the 18-inch run from the counter to the underside of the wall cabinets. If you have uppers and want real splash protection, this is usually the better fit.
A full-height backsplash runs from the counter to the ceiling or to a shelf. It reads as deliberate when there are no upper cabinets or when you want a show wall.
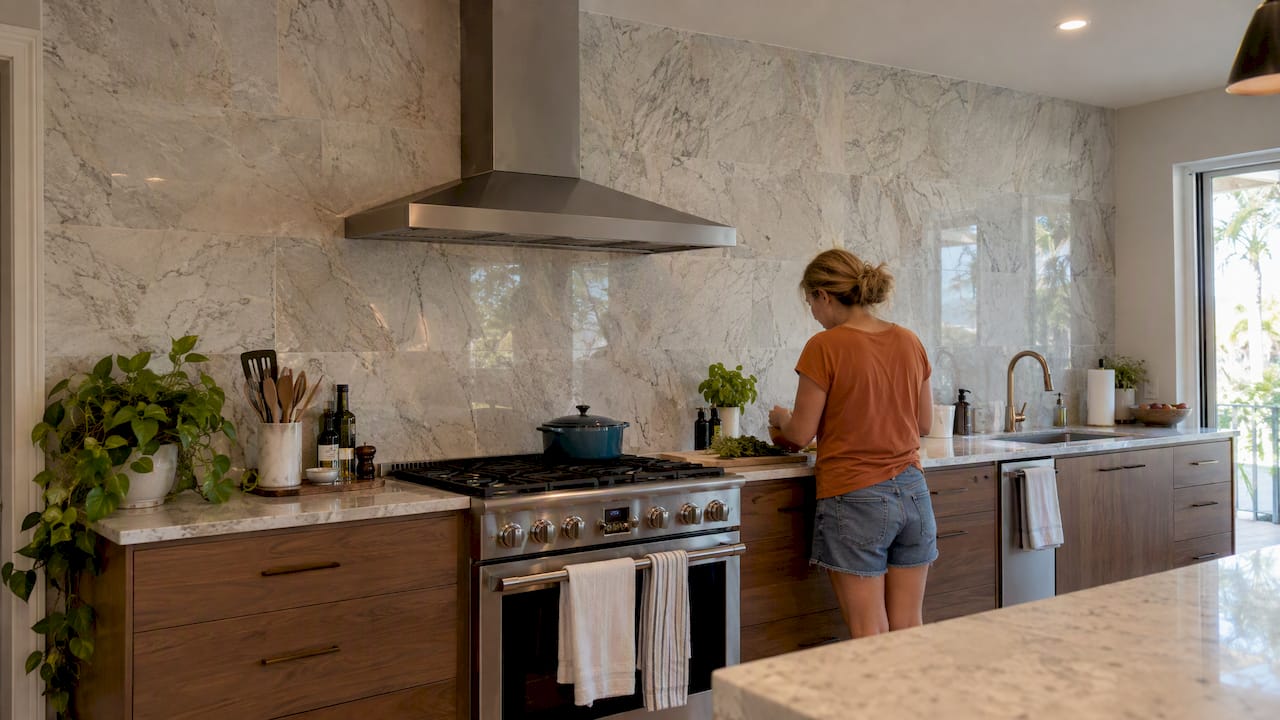
Behind the range, designers typically extend tile to the underside of the hood, about 24–30 inches above the cooktop, to handle heat and grease. One visual rule: don’t stop tile at an arbitrary mid-wall height. Align the top edge with a cabinet bottom, shelf, window head, or hood.
How do you measure backsplash height and area?
Measure before you shop, and measure from the right place.
- Start at the finished countertop surface. Never assume nominal cabinet or counter heights. Countertop thickness and cabinet mounting both change your real number.
- Measure each wall run separately. The area is wall run length times counter-to-cabinet height, and you should convert inches to decimal feet before multiplying. Treat the taller section behind the range or hood as its own rectangle.
- Handle openings carefully. Deduct windows only where the tile won’t cover them. If tile wraps a window return, don’t subtract it.
- Record outlets. Note where each box sits, since tile will be cut around them.
- Plan the install lines. Installers snap a plumb center line and a level baseline rather than trusting the countertop as a reference, then use a ledger board to hold tiles while adhesive sets.
Then re-measure once the countertop is actually installed. A measurement surprise is cheap to fix on paper and expensive after a slab is cut.
How does backsplash height affect material choice and cost?
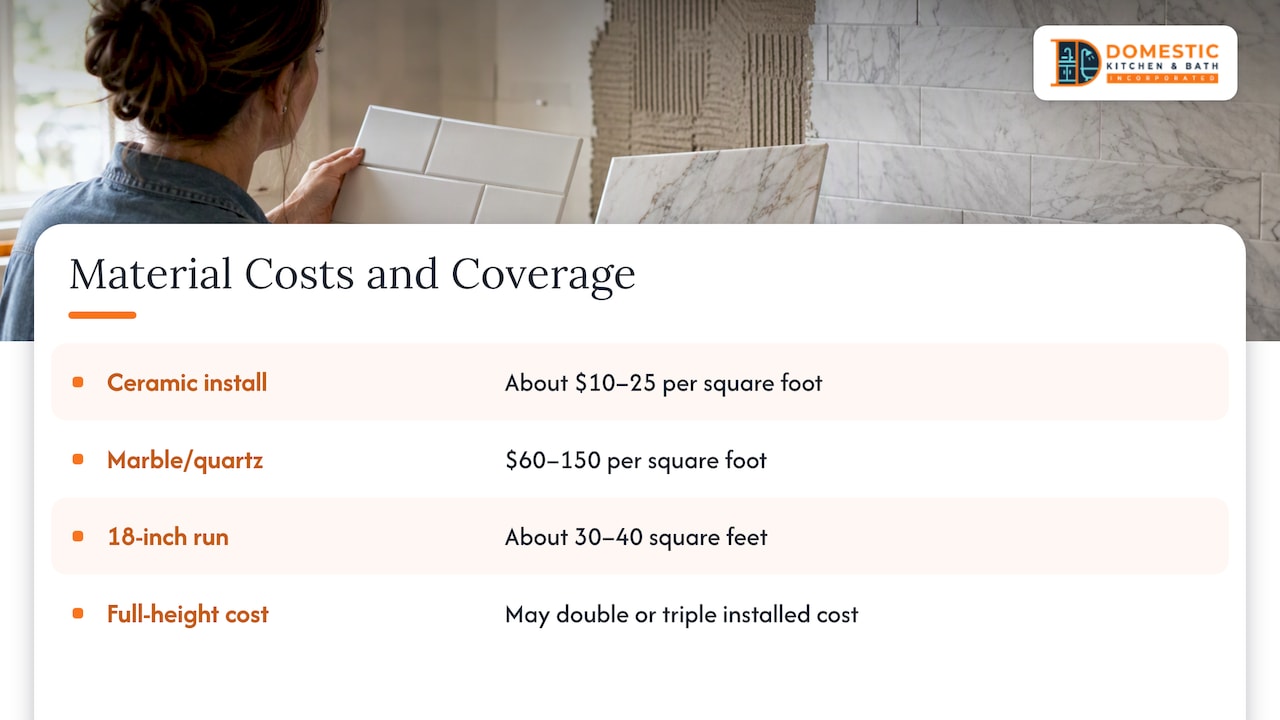
Height changes square footage, and square footage drives price. Ceramic tile often installs for about $10–25 per square foot, while marble or quartz slabs can run $60–150 per square foot. That source also notes a standard 18-inch run in most kitchens covers about 30–40 square feet. Run those numbers and you can see why material choice matters more than height alone: the same area is a modest line item in ceramic and a major one in marble.
Full-height runs push costs up further. You buy more material, use more adhesive, and spend more labor hours, sometimes with ladder or scaffold work. One roundup notes full runs may double or triple installed cost depending on ceiling height.
Material fit follows the same logic. Lightweight tile or thin slabs make sense for tall, full-height walls. Stone or short slab pieces work well for 4-inch curbs, where you need little material and want a premium edge.
Maintenance also favors going taller. A full-height surface wipes clean in one pass, and you have less painted drywall near the sink and stove to touch up after splashes.
How do you choose the right backsplash height for your kitchen?
Work through these factors in order: how heavily you cook, how much visual impact you want, whether you have upper cabinets, where the hood sits, how much cleaning you tolerate, and your budget.
Then apply some rules of thumb:
- Heavy cooking: go taller behind the range, up to the hood.
- Upper cabinets present: the 18-inch counter-to-cabinet run gives functional protection.
- No uppers: go full-height, or at least to a shelf or the ceiling.
- Tight budget: a 4-inch backsplash with painted wall above is the cost-sensitive standard.
For proportion, tie the top edge to something the eye already sees: a window head, a shelf line, or the bottom of a cabinet. That is what keeps a backsplash from looking like an afterthought.
Bring in a pro when the hood or wall geometry is complex, when you’re ordering slab fabrication, or when outlets need to move. Those are the jobs where a small error becomes an expensive one.
What installation and code details affect final height?
Outlets are the usual surprise. NEC 210.52© governs how far apart countertop receptacles sit, not how high they are. Electricians commonly center backsplash outlets about 18 inches above the finished counter, but that is a convention, not a code height.
Hoods have their own clearances. Hood-to-cooktop distance is typically 24–30 inches, and the backsplash should meet the hood.
Sequence matters. Install the countertop first, then template the backsplash from finished dimensions. Fabricators need real numbers, not plans.
For outlet cutouts, common practice is to cut openings slightly larger than the box, so tile or slab plates fit without cracking.
What should you check before measuring and ordering?
- Measure each run length in feet, and the finished counter-to-cabinet height in inches, converting to feet for area math.
- Record the taller stove or hood section as a separate rectangle.
- Note window widths and heights, and where tile stops.
- Count outlets and mark their locations, since tile gets cut around them.
- List trim pieces and add an overage percentage to your order.
- Re-measure from the installed countertop before any slab fabrication.
Pro Tip: Photograph each wall with a tape measure in frame, so the numbers on your sheet match what your installer will see.
Which backsplash height would I pick as a default?
If you have wall cabinets, run the tile from the counter to the uppers, about 18 inches, or choose a visible 4-inch partial if budget is tight. Go full-height when there are no uppers or you want a show wall. Measure from finished surfaces and template after the counter goes in, because that habit can help prevent costly mistakes. For full-height slabs or a tricky hood, talk to a remodeler first.
— Mark
How can we help with your backsplash project?

When you remodel a kitchen with us, backsplash height gets settled early, alongside layout and materials. We are a family-owned team, and we template from your finished countertops, help you choose materials, install the work, and manage the project from start to finish. We stand behind our work in our Sarasota service area. Ask us about available warranty coverage. If you want a standard run or a full-height wall done right the first time, request an estimate for your kitchen remodeling project and we will walk through your options with you.
FAQ
What is the normal height of a kitchen backsplash?
Most backsplashes are either a 4-inch partial or an 18-inch run from the counter to the wall cabinets. Low versions suit a minimalist look, and full-height versions go to the ceiling. Behind the stove, tile typically goes up to the hood.
Is a 3-inch backsplash okay?
Yes, if you want a clean, minimal look and don’t mind splashes reaching the wall above. A low backsplash seals the counter-to-wall joint but gives little protection. Near the sink and stove, a taller run is usually more practical.
How high do you put a backsplash behind the stove?
Designers commonly extend it to the underside of the range hood, roughly 24–30 inches above the cooktop. This protects the wall from heat and grease, and it should align with the hood’s edge for a finished look.
Should I measure the backsplash before or after the countertop is installed?
Do both: plan early, then re-measure after the countertop is in. Finished dimensions are what fabricators and tile setters need to avoid cutting errors.
Sources
- Backsplash
- Cletile
- Kitchen Backsplash Ideas: Materials, Heights & Costs | Interior Design Trends
- How to template a countertop backsplash with outlets | SlabWise
- How to Measure a Kitchen Backsplash for Tile | BuildMeasure